
6 min readA hybrid Android/iOS application with Rails and Turbolinks 5
May 12 2016 | News
Since a recent tweet from @DHH, we wanted to try the lastest beta of Ruby On Rails for our R&D at Dexem, which introduces the brand new version of Turbolinks.
What is Turbolinks ?
You may already know this name, for the good reason this component already exists in Rails version 4. To be simple, the goal of Turbolinks is to turn your Rails Web application into a Javascript one, in order to let users consult it from a single page. The client doesn’t need to reload all the content each time, the body of the page is replaced by new data provided with an async request to the server. In a way, it looks like the AngularJS approach, because both use HTML History API.
But the new big feature from Turbolinks 5 is the two new wrappers that let developers build simple natives iOS/Android applications, working with some views of their Rails 5 web-app. This wrappers are similar to native web views. In fact, you’re going to be able to work with Turbolinks callbacks from your Web app to your mobile app and vice versa.
How we tested Turbolinks 5 on Dexem products
At Dexem, our customers would like to have an mobile extension of our Web applications. We’ve decided to focus on their needs, and it appeared that the features they wanted, are not too difficult to develop in a mobile context.
From this point, we had different choices :
- Start native developments on both iOS and Android
- Start a hybrid Javascript development with Titanium or Cordova
- Test Turbolinks 5 and Rails 5
We’ve decided to choice the third option. Why ? Because if you try to work with Turbolinks wrapper on both Android and iOS, you’ll realize that’s the integration process is dead easy. In just a few hours, we were able to link our Web application with the mobile application and all was stable. Our team had all the skills required by this operation, and the evolution of the mobile application was going to be easy.
How did I make it work?
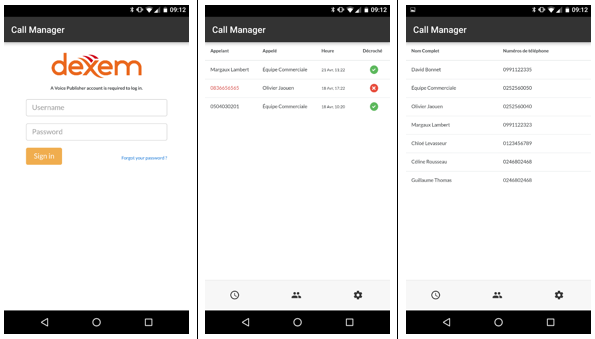
We needed to be able to build some views of our Web application into a mobile one. This Web application works with MySQL database to fetch data. First, we put four mobiles views in it:
- a form
- a recent calls list
- a contact page
- a settings page
Prerequesites:
- RubyGem
- Android Studio
- Ruby On Rails Version 5.0.0.beta3
First, we have generated a simple Web application project with the following Rails command.
| rails _5.0.0.beta3_ generate dexem-webapp |
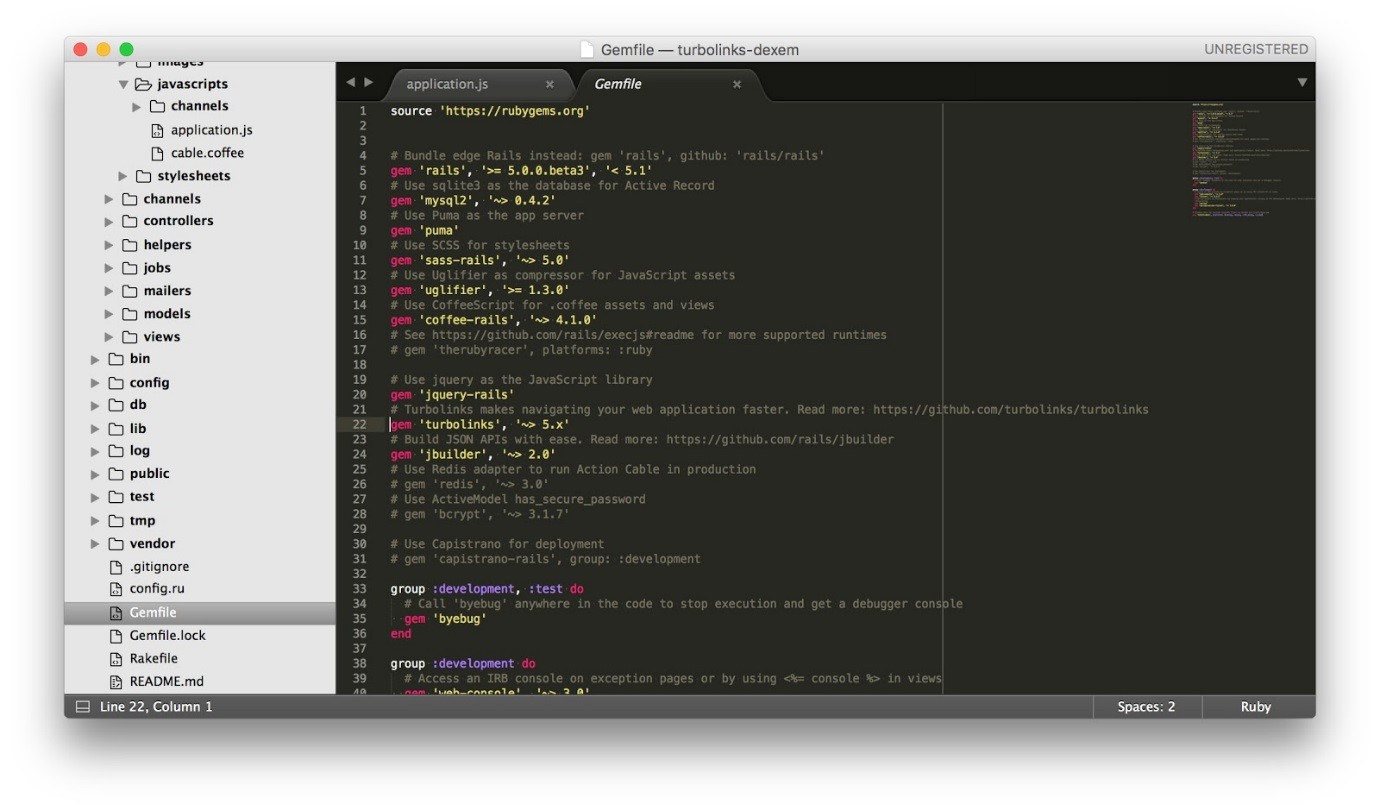
This allows you to bring automatically the needed Gemfile dependances (like Turbolinks 5) in your project. You can also do it manually.
Next, we defined four methods in a controller with their associated routes and views. Two of them used Active::Support to fetch data in our MySQL database. The other ones displayed the belonging controller’s view.

Finally, we made the web-app available from our network with the following Rails command :
| rails s <local_ip>:<port> |
Let’s now have a look on the mobile part, and see how the Android wrapper of Turbolinks works. With Android Studio, we first created an empty single view application.
We had to provide the correct permission in the Android manifest :
| <uses-permission android:name=”android.permission.INTERNET” /> |
As we said before, using the Android wrapper of Turbolinks proves to be very simple. See the minimal requirements on the Turbolinks Github. Though, you will need a few skills to understand the life cycle of an Android mobile application.
For the next step, we had to add the Turbolinks Adapter interface, the mandatory methods for our class, and the Turbolinks View.
- public void onPageFinished()
- public void onReceivedError(int errorCode)
- public void pageInvalidated()
- public void requestFailedWithStatusCode(int statusCode)
- public void visitCompleted()
- public void visitProposedToLocationWithAction (String location, String action)
If you want Turbolinks to work successfully, then you’ll need to create an instance of the TurbolinksSession object by following the onCreate method of your activity. It will activate Turbolinks system in your activity and load the URL in the Turbolinks Webview.
| @Override
protected void onCreate(Bundle savedInstanceState) { // Standard activity boilerplate here… super.onCreate(savedInstanceState); setContentView(R.layout.name_of_your_view_activity); // Assumes an instance variable is defined. Find the view you added to your // layout in step 1. turbolinksView = (TurbolinksView) findViewById(R.id.turbolinks_view); location = getIntent().getStringExtra(INTENT_URL) != null ? getIntent().getStringExtra(INTENT_URL) : “https://<local_ip>:<port>”; TurbolinksSession.getDefault(this) .activity(this) .adapter(this) .view(turbolinksView) .visit(location); } |
What happens when a link is clicked on the Web application from the Turbolinks View ? This is the role played by the visitProposedToLocationWithAction method.
| @Override
public void visitProposedToLocationWithAction(String location, String action) { Intent intent = new Intent(this, MainActivity.class); intent.putExtra(INTENT_URL, location);
this.startActivity(intent); } |
This method is called every time that Turbolinks notices a link that has been clicked on in the Web application. Once it’s done, it creates a new activity in our application and attaches the URL to visit. All this stuff will be caught after in the onCreate method. And so the URL will be loaded in our Turbolinks Webview.
You can also use visitProposedToLocationWithAction to provide more actions like : opening a native application, start a different activity…
This is what we’ve done at Dexem. As you can see on the screens below, we have implemented two differents activities. One empty, and one with native navigation buttons.
To let the app history work, we’ve also need to add the onRestart method in our activity :
| @Override
protected void onRestart() { super.onRestart(); TurbolinksSession.getDefault(this) .activity(this) .adapter(this) .restoreWithCachedSnapshot(true) .view(turbolinksView) .visit(location); } |
No big surprises here, again you have to call the default TurbolinksSession instance, and then add the restoreWithCachedSnapshot(true) option, to retrieve the user’s navigation history in the WebView.
Your class for a single simple activity should be like the code below :
| package com.dexem.callmanager;
import android.support.v7.app.AppCompatActivity; import android.os.Bundle; import android.content.Intent; import com.basecamp.turbolinks.TurbolinksAdapter; import com.basecamp.turbolinks.TurbolinksSession; import com.basecamp.turbolinks.TurbolinksView; public class MainActivity extends AppCompatActivity implements TurbolinksAdapter { private static final String INTENT_URL = “intentUrl”; private static final String BASE_URL = “https://<ip_locale>:<port>”; private String location; private TurbolinksView turbolinksView; @Override protected void onCreate(Bundle savedInstanceState) { super.onCreate(savedInstanceState); setContentView(R.layout.activity_main); turbolinksView = (TurbolinksView) findViewById(R.id.turbolinks_view); location = getIntent().getStringExtra(INTENT_URL) != null ? getIntent().getStringExtra(INTENT_URL) : BASE_URL; TurbolinksSession.getDefault(this) .activity(this) .adapter(this) .view(turbolinksView) .visit(location); } @Override protected void onRestart() { super.onRestart(); TurbolinksSession.getDefault(this) .activity(this) .adapter(this) .restoreWithCachedSnapshot(true) .view(turbolinksView) .visit(location); } @Override public void onPageFinished() { } @Override public void onReceivedError(int errorCode) { } @Override public void pageInvalidated() { } @Override public void requestFailedWithStatusCode(int statusCode) { } @Override public void visitCompleted() { } @Override public void visitProposedToLocationWithAction(String location, String action) { Intent intent = new Intent(this, MainActivity.class); intent.putExtra(INTENT_URL, location); this.startActivity(intent); } } |
Want to start using Turbolinks 5 and Rails 5 now?
Turbolinks version 5 may still be a little young, and lack of community, though developing mobile application with Turbolinks represents an interesting perspective. Indeed, by adopting a hybrid development mostly based on a Web application on Rails 5, the cost of maintenance and development is significantly lower than specialized teams in native development. If you have any doubt, know that Basecamp 3 uses Turbolinks 5 and Rails 5 for the mobile application. DHH wrote a interesting post on his blog about managing the development of an application.